We convert your family member’s birth date and birth location to years and location data (latitude and longitude) and show them on an interactive map.
Each colorful dot is a member of your tree, and the color represents the centuries that the ancestor was born.
The “Members” tab can summarize all the family members in a list view.
You can click them, and it shows the details of each member imported from your family tree. The detail view includes features like Trace Back To Me (see the “Trace Back To Me” section below) and Set as Owner.
Your map defines one person as an “Owner” of the tree. This is the root person of the tree, and usually, it is yourself. You can find who is currently defined as the owner under the Records tab and find the one with a ★ mark.
You can also change the owner by clicking “Set as Owner” to change to another person on the map.
Adjust pin location
While we do our best to convert your birthplace information into accurate geographic data, some unusual locations may appear due to limitations in our algorithm.
If you notice any inaccuracies, you can manually correct them using the “Adjust pin location” feature.
Your adjustments are saved to your account and carried over to future GEDCOM uploads. This means when you upload a new GEDCOM file, our system will try to apply your previous location corrections automatically—so you won’t need to fix them again one by one.
Year-based filter
You can change which family members show up based on their birth year.
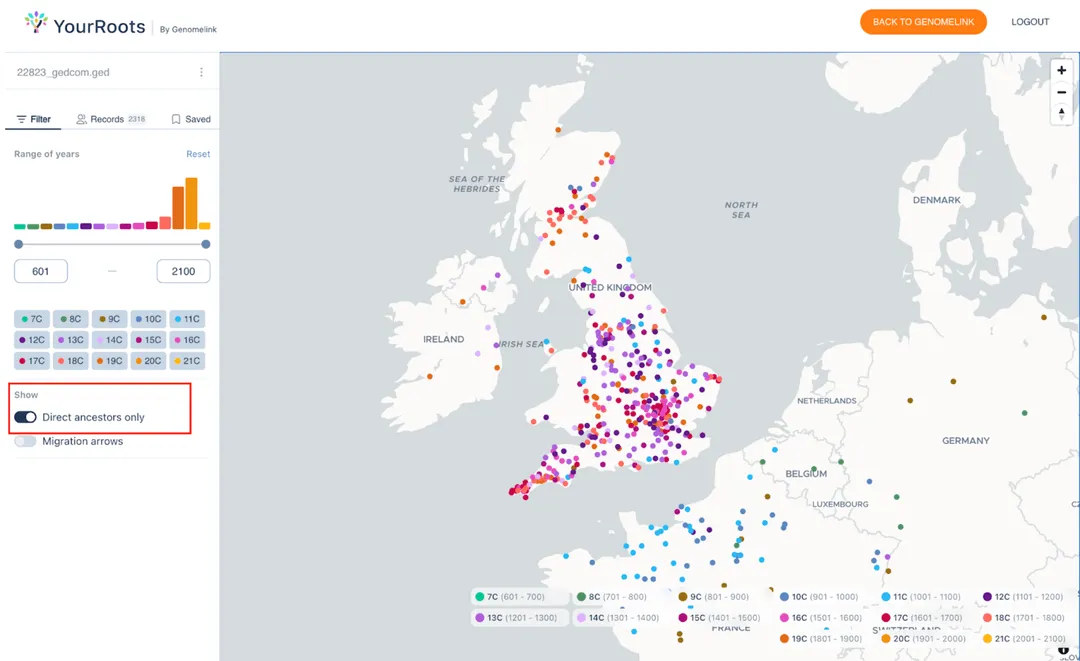
Under the “Filter” view, you can change the period or click the colorful icons to specify centuries.
For example, the image below shows family members born in the 9th century.
Add “Direct ancestors only” filter
The default view shows all the records that we detected parsable birth date and birthplace data, including your cousins and their trees.
By turning on the “Direct ancestors only” filter, you can limit the family members to show only ones who are the direct ancestors of the “tree owner” (typically you), meaning your parents of parents of parents…
Note: If you do not see any members showing up with the filter or a significantly smaller number than what you think it should show, there are some scenarios:
a. You might be missing the birth date and birthplace of yourself (the owner, root person) or your closest direct parents. The current logic for detecting direct ancestors involves tracing the direct parent relationship from the root person.
b. There might be some family members in your direct ancestors who you do not have parsable birth date and birthplace data. When they do not appear on the map, the other ancestors are not detected as your direct ancestors.
Add “Migration pattern”
You can show all the migration patterns between direct parents/children by turning on the “Migration arrows” filter. (See the image below)
Note: However, the feature is not currently enabled for users with a significantly large family tree (e.g. above 2,000 members). Please use the “Trace back to me” feature introduced in the next section for those users.
★ “Trace Back To Me” (Highly recommended)
The Trace Back To Me feature is a key feature we’re excited about in the current beta version.
Turn on the "Show direct ancestry only" filter
Note: Currently, this feature is activated to trace the migration pattern between the map's owner and a selected direct ancestor member only.Select a family member >> Click “Detail” >> Click “Trace back to me”
Upload multiple GEDCOM
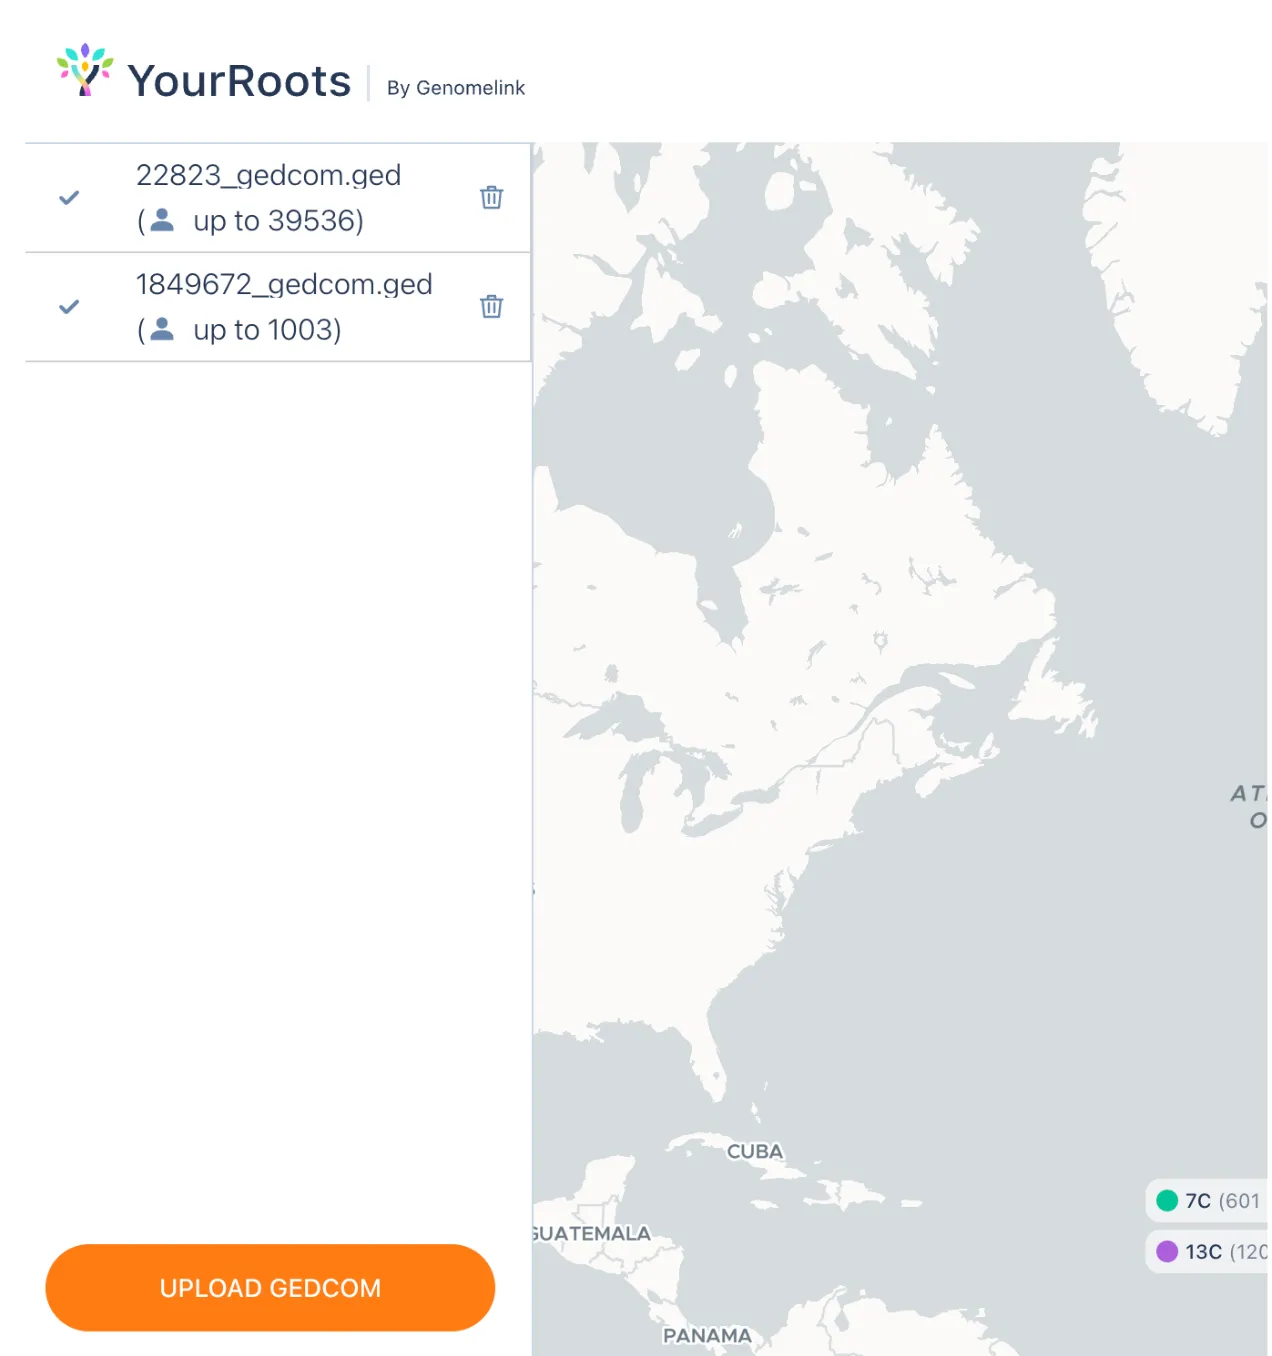
You can upload multiple GEDCOM files
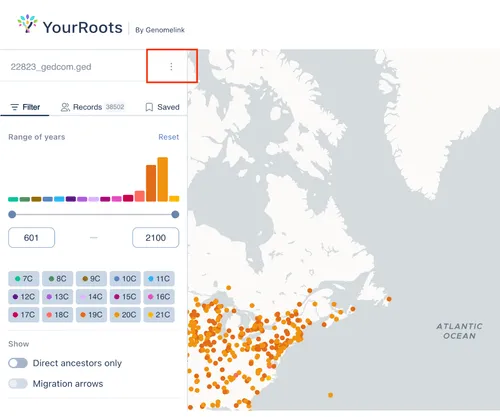
Click the three-dot icon below. Then, you will be navigated to the multiple GEDCOM upload screen.
FAQ
If you have any questions you cannot answer in this FAQ, please contact me (co-founder of YourRoots Map, tomo@genomelink.io) directly.
Why are there inaccurate locations?
We continue improving the location conversion algorithm, but it cannot be 100% accurate. In particular, we’re aware that it can show your member’s location weirdly when:
Multiple towns or cities exist under the same name.
The names of places are old names that do not exist today.
Your birthplace text information is not clear to read.
Why do some of my family members not show up on the map?
In many cases, this happens due to missing birthplace and birth date information of your family members on your tree. We use both birthplace and birth date to generate geographic information to show on the map, and if either one of them is missing, we cannot show the member on the map.
How can I trace my migration pattern?
We recommend using the “Trace Back To Me” feature.Turn on the “Show direct ancestry only” filter.
Note: Currently, this feature is activated to trace the migration pattern between the map's owner and a selected direct ancestor member only.
Select a family member >> Click “Detail” >> Click “Trace back to me”
How can I change the owner (root person)?
You can change the owner (root person) from the member detail view below.
How can I check who the owner (root person) is?
Under the “Records” tab, you can confirm who is the current owner with the ★ mark
What is GEDCOM?
A GEDCOM (Genealogical Data Communication) file is a plain-text format designed to store and exchange genealogical information. It holds details about individuals, their family relationships, and various life events (like births, marriages, and deaths), making it easier for different genealogy software programs to share and integrate data.
Download GEDCOM
You can download your family tree as a GEDCOM file from major genealogy sites. It generally takes only a few minutes.
FamilySearch users can use our FamilySearch Import feature. On the tree upload/import screen, select “FamilySearch” and follow the instructions. Under our partnership with FamilySearch, we can automatically import your tree to YourRoots Map by logging in to your FamilySearch account.
However, please note that we’re currently importing only up to 8th generations due to a technical limitation (usually, it ends up about 200-300 members in total out of your entire family tree). If you wish to import your whole FamilySearch tree, please contact us at tomo@genomelink.io so we can advise further.
• From Geni
Log in to Geni and click the 'Family' tab
Сlick the 'Share Your Tree' link and then click 'Export'.
When you click the button to export your GEDCOM file, Geni will generate your GEDCOM file and send you a link to download it.
• From Findmypast
Head to Family Tree >> View all trees first, then find the tree you wish to export.
Hover over to the right and find the export icon, in between the settings and trash icons.
The tree will export, and then you can download the GEDCOM to your computer.
Click “Upload GEDCOM” Or “Import from FamilySearch”
Usually, it takes 10-30 minutes to process your GEDCOM file, but it may take longer (sometimes hours) if you have a significantly large family tree. You will receive an email notification with a subject like “YourRoots Map is ready to view” once it is ready “Export to GEDCOM” of a tree that you want to export.
YourRoots profile
Collaborate on family tree
DNA match result
Discover more about your family together with 200M+ family tree builders & 50M+ DNA test kit users
Start quickly
Import your family tree (GEDCOM) and DNA data file (optional) from major family tree and DNA test services like Ancestry, MyHeritage, or 23andMe with just a few clicks.
Build YourRoots profile
Add any previous genealogy work and manage everything from one convenient profile, making it easy to keep track of your entire family history.
Connection requests and messages
You can send connect requests and messages to access more information about your matches.
Collaborative tools
We prepared many collaboration tools and will continuously add more, starting with the collaborative family tree editor.
Community of helpers
Join a community of genealogists who help each other’s brick-wall challenges. The more you share on your profile, the more help you can get from other members.
How to start
1. Sign up to Genomelink to join our community.
2. Create your FREE Genomelink profile to secure your early access. You can import your existing family tree as a GEDCOM file and raw DNA data file